
Chute Cover, Distribution Slide, Scraper Wire and/or Roller Replacement Instructions
Download this page as a printable pdf: Replacement Instructions
Chute Cover and/or Distribution Slide Replacement
Scraper Wire and/or Roller Replacement
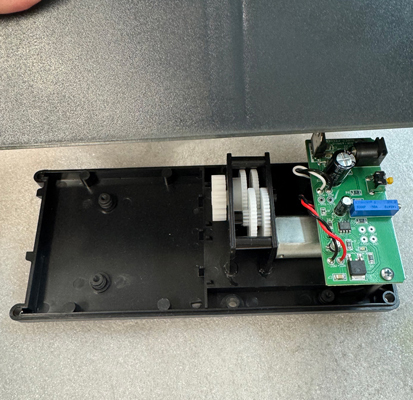
Fig. 1a
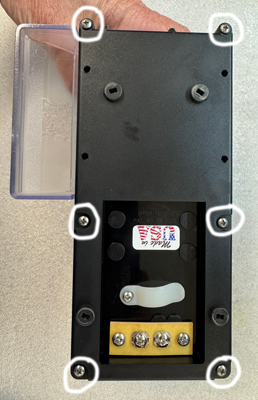
Fig. 1b
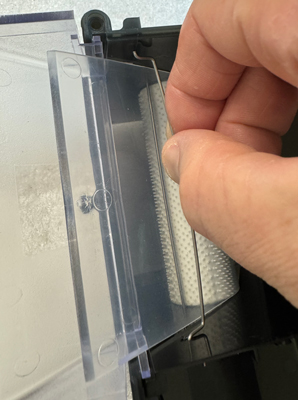
Fig. 2
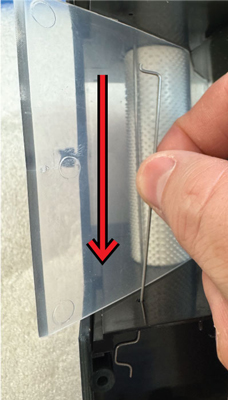
Fig. 3

Fig. 4
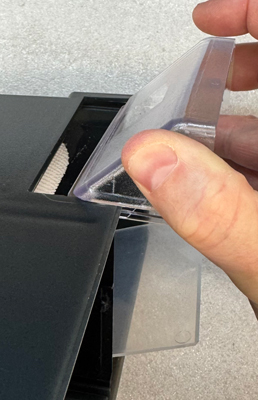
Fig. 5
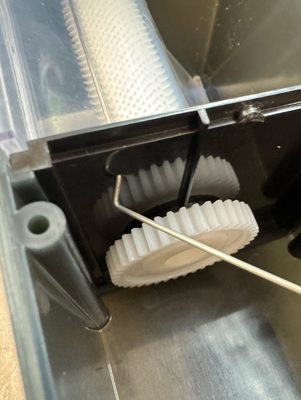
Fig. 6a
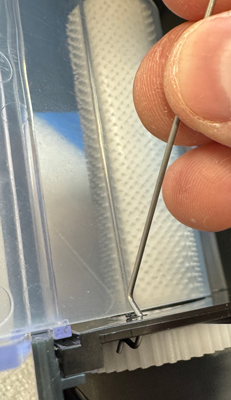
Fig. 6b
Fig. 6c
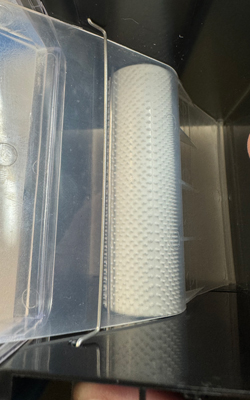
Fig. 7
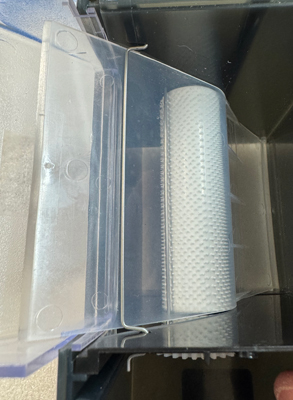
Fig. 8
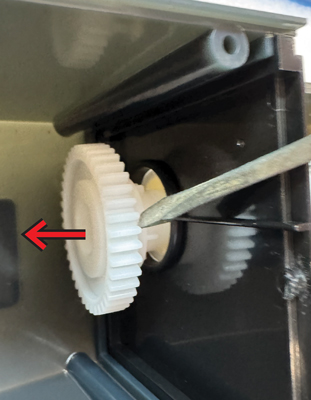
Fig. 9
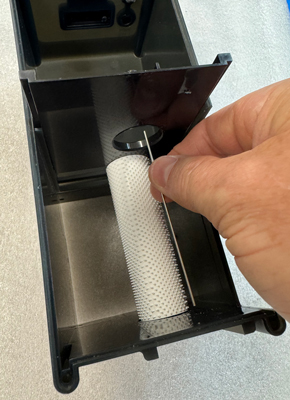
Fig. 10
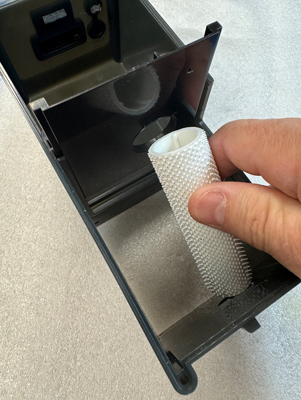
Fig. 11
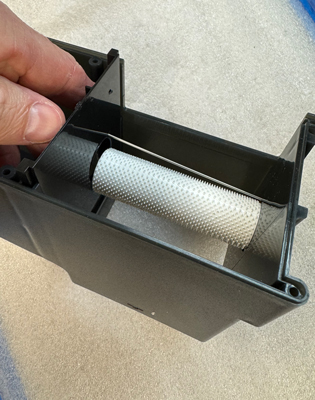
Fig. 12
Chute Cover and/or Distribution Slide Replacement
Note: The chute cover does not snap in or out.
- Remove the bottom floor by removing the six retaining screws (Fig. 1).
- Remove the shaker wire from underneath the distribution slide. The wire is flexible-slightly flex one side (Fig. 2), remove it from the hole, and carefully weave the loops out in the direction shown (Fig. 3).
- Move the distribution slide out of the way.
- To replace the slide, flex the ribs to release the slide (Fig. 4). The slide will snap out. Reinstall in reverse order.
- Remove the old chute cover and install the new one by slipping the slotted edges into the chute opening frame. Push evenly side to side until fully seated (Fig. 5). Do not force the cover.
- Move the distribution slide back into position next to the roller.
- Reinstall the shaker wire underneath the slide so it lays flat against the slide bottom. Carefully weave it back into the feeder holes (Fig. 6a - 6c).
- Hold the housing upside down and position the shaker wire: down to enable shaking (Fig. 7) or up to disable shaking (Fig. 8). Reinstall the bottom floor and secure it with the six retaining screws. Do not overtighten.
Final Check:
Test-run the feeder to confirm the slide vibrates properly (if the shaker wire is enabled).
Scraper Wire and/or Roller Replacement
- Complete the removal steps in Chute Cover Replacement.
- Remove the large white plastic gear by pulling it out of the roller (Fig. 8).
- Lift the center bulkhead approximately 1/2 in. (Fig. 9) or remove it completely and remove the scraper wire.
- If replacing the roller, slide the bulkhead upward and remove the roller at an angle. Install the new roller in reverse order (Fig. 10).
- With the bulkhead still angled, install the scraper wire by inserting one end into the hole inside the outer housing wall. Slightly flex the opposite end and insert it into the hole in the center bulkhead (Fig. 11).
- Slowly press the bulkhead back into place making sure that the scraper wire is fully seated into holes on both sides.
- Reinstall the plastic gear into the roller. Slowly rotate and press the gear until it engages the internal lock which will allow it to slide fully into place.
- Reinstall the shaker wire underneath the slide so it lays flat against the slide bottom. Carefully weave it back into the feeder holes (Fig. 5).
- Hold the housing upside down and position the shaker wire: down to enable shaking (Fig. 6a - 6c) or up to disable shaking (Fig. 7). Reinstall the bottom floor and secure it with the six retaining screws. Do not overtighten.
Final Check:
Test-run the feeder to confirm the slide vibrates properly (if the shaker wire is enabled).