Back to HOME PAGE
|
PROBLEM |
POSSIBLE CAUSE/SOLUTION |
|
PROBLEMS WITH ASSEMBLY?
|
Please view video which will be extremely helpful for assembly and operation of the Super Feeder. You should have a link to the video in the feeder manual. Maintenance video |
|
UNIT DOES NOT RUN, DOES NOT RUN PROPERLY, OR DOES NOT TRIGGER AT PROGRAMMED REMOTE TIMER TIME or WHEN TIMER IS MANUALLY SWITCHED “OFF AND BACK ‘ON” AGAIN.
Some Super Feeders may have two internal lights: One power light is blue instead of green when feeder is powered, and a green light, which will only be on while motor is running. Also, the original feed adjustment dial has been replaced by a multi-turn slotted shaft screw-type portion controller for finer tuning of feed cycle time. Use supplied plastic screwdriver to turn dial of portion controller shaft. Slotted shaft portion controller approximate run/timing change: 1 full turn = 4 seconds----1/4 turn = 1 second |
1. Confirm power light (steady green or blue depending on model) illuminates when you plug the power adapter directly into an outlet. If power light not on, power supply could be defective. You may use any other power adapter with 12VDC or AC output. Also check for proper electrical connections/wire chewed. Try switching wire connections under the feeder if using that alternate input with DC power. If still not on, call or send an e-mail to possibly return unit for service. 2. If power light is on (late model has blue power light and green motor light while motor is supposed to run), push reset switch and confirm that motor runs. With power off, push reset switch for 5 seconds, then plug power adapter directly into an outlet without timer. If it does not run, motor is defective (call on us). If it runs, check timer for proper operation/setting/programming. If timer's outlet does not put out power when manually or automatically turned on (test with a lamp), replace timer. Any timer can be used. 3. Reset “off” time not long enough (most common!). Make sure feeder is at least off for a minimum of 1-2 minutes between feed cycles to reset itself. If testing the feeder repeatedly, manually void required "off" reset time between test cycles by pushing the reset switch for 5 seconds with no power going to the feeder. For older feeder with "jumper" plug see: http://super-feed.com/adjustment.htm 4. Feeder triggers/runs for just a split second. Make sure feed cycle time adjustment is not turned all the way down (very important). Turn dial/portion controller shaft clockwise. |
|
AQUARIUM MODELS
FLAKES STICK TO SLIDE AND/OR FUNNEL EXCESSIVELY. |
1. Surfaces damp or wet. Funnel’s lower end is out of the water and/or bubbles are bursting and splattering around the feeder’s chute. Make sure the funnel is at least 1/2” below the water line at all times and not installed directly above a bubble source/generator. Also, the feeder’s chute and slide may be too close to the funnel’s neck. Slightly move feeder away or move feeder to other area. Check slide for shaking action. |
|
UNIT RUNS BUT DOES NOT EXPEL FOOD PROPERLY. |
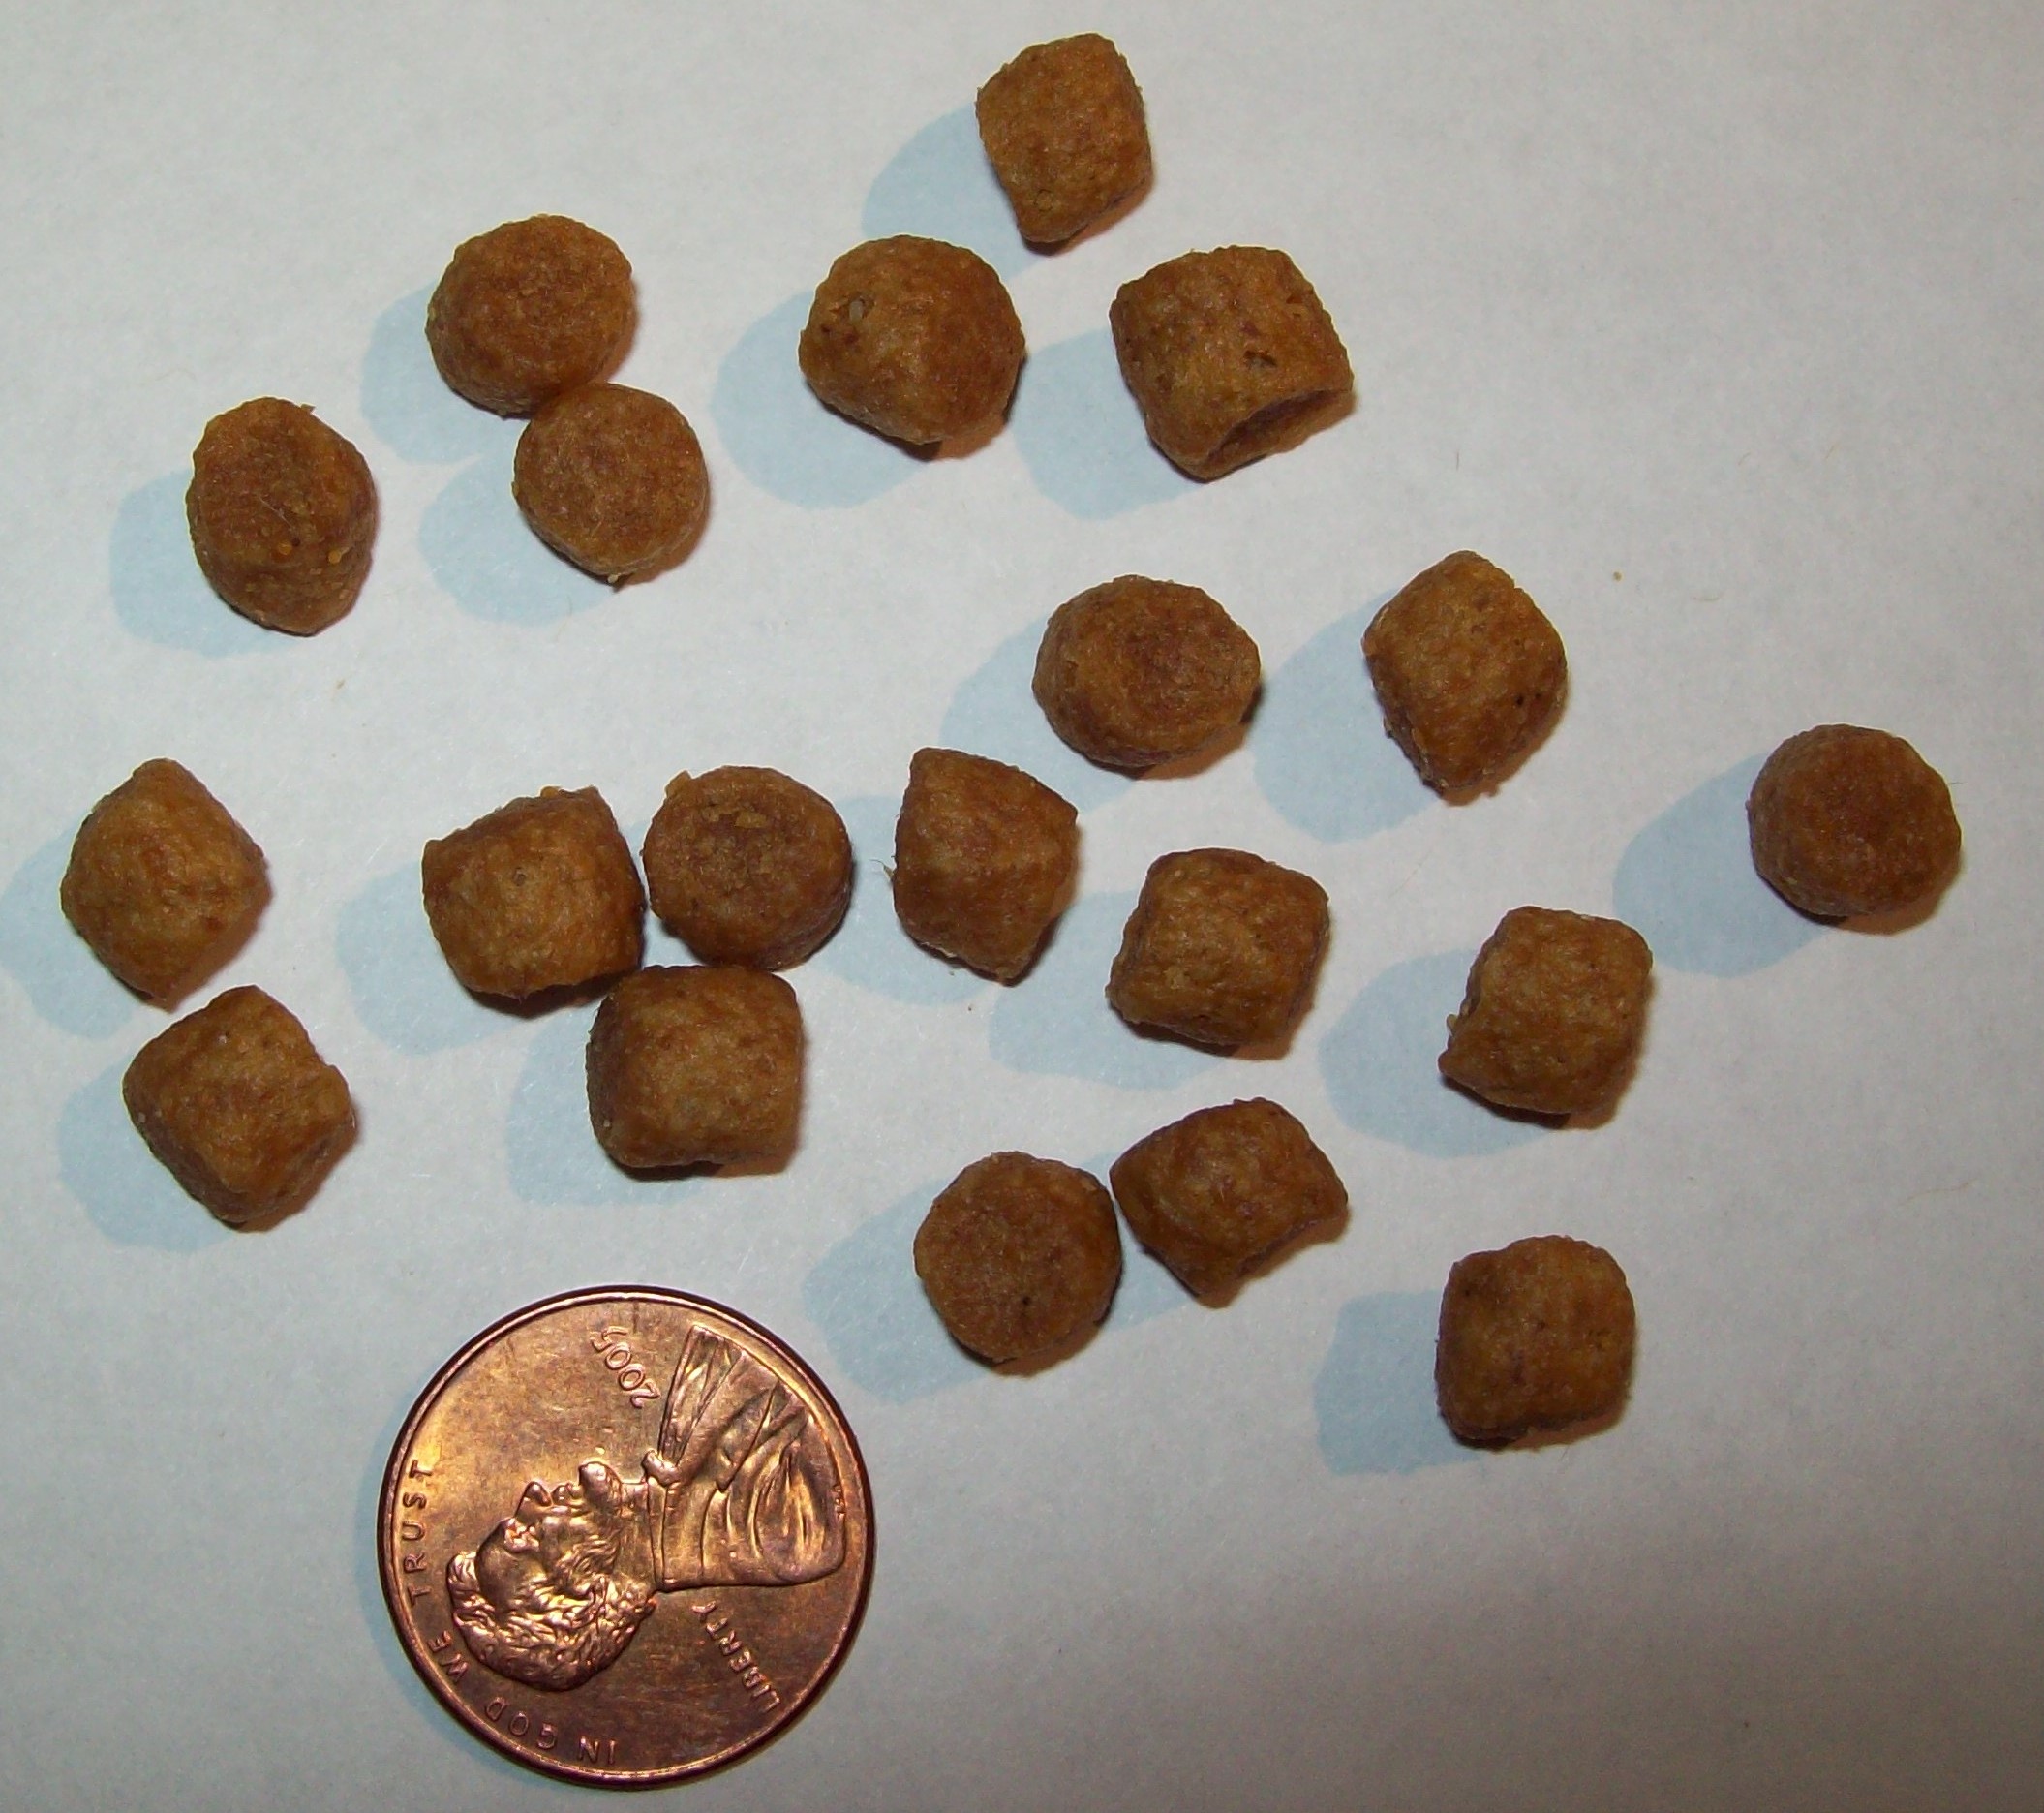
1. Hopper empty. Fill. 2. Dampened or wetted hopper food. ASF-1 aquarium feeder: Environment too humid or wet. Seal the top of the aquarium directly above the water. 3. Food packed. Loosen food. Do not pack when filling the hopper! ASF-1 aquarium Feeder: Try mixing a few small pellets with the flakes...It could help! 4. Food too large. ASF-1 aquarium feeder: Crush or replace food with smaller size. CSF-3: See #9 below. 5. Feed time adjustment incorrect. Turn portion controller's dial or slotted shaft right or left in fine increments to achieve correct timing for desired portion size. 6. Gate to roller gap too small. Rotate large black nylon screw counterclockwise located above chute. Portion adjustment quick set-up 7. Distribution drum surface worn out (all the small teeth sheared off). Return for service or order new drum (also referred to as "roller." Clean inside if needed. 8. Slide does not shake. Check for shaking action (very important). Make sure trip/shaker wire is not dislodged. 9. Cat food: If using chute cover on cat feeder, make sure kibbles are not hung up inside feeder at chute opening. Clear area and consider using smaller food (1/4" spherical kibbles recommended). If the feeder is allowed to run that way for a long time, the teeth on the drum will wear off prematurely. |
|
UNIT EXPELS TOO MUCH FOOD |
1. Feed cycle time too long. Turn portion controller's dial or slotted shaft to the left in small increments using the small plastic screwdriver to achieve correct timing for desired portion size. 2. Gate opening too wide. Reduce gate to roller gap by turning large black screw above chute opening clockwise. |
|
UNIT CRUSHES FLAKES TOO MUCH (ASF-1 feeder) |
1. Gate to roller gap too narrow. Open gate by turning large black screw above chute opening Counterclockwise. |
|
FEEDER VERY NOISY CAUSED BY SLIDE SHAKING MECHANISM OR
METAL/PLASTIC BOWL
|
Check for stuck kibbles between distribution slide and chute opening and/or roller. I caused by slide shaking mechanism, you may also disable slide shaking mechanism-if doing so, make sure larger kibbles do not get stuck at chute. If bowl is too noisy for you, try stuffing a small towel or other material underneath it to dampen the noise. |
|
WATER/MOISTURE IN BASE OF OUTDOOR FEEDER |
1. Feeder tilted or water splattering into chute. Correct and remove one or more rubber feet. Do not install feeder too close to water (Koi pond feeder). Make sure rubber plugs are secure!! New rubber plugs |
|
ANIMALS CHEW ON FEEDER WIRES |
1. Wires too exposed. Protect wires using flexible vinyl tubing or wire protective material found at Home Depot or Lowe's or office supply place. Hide wires as much as possible. We also have a wire protective Flex Guard available online. |
| HOPPER, LID, EXTENSIONS LOOSENED BY PETS OR WILD ANIMALS CAUSING THEM TO SEPARATE FROM MACHINE OR OTHER ACCESSORIES. | First, make sure you have locked each extension or lid on the machine, other extensions or 1.5 gallon hopper correctly! Use extra strap or wire at upper part of upper extension (not for short stand) and/or carefully drill and install longer screws all the way through extensions or hopper if needed. Securely attach feeder!! |
| FOOD COMES OUT BUT PORTIONS NOT ACCURATE ENOUGH (CSF-3) | Food type will dramatically affect portion accuracy with flat and/or large kibbles in any feeder. Best performance has been shown using 1/4" spherical kibbles from Science Diet or other Brands. Check roller condition. Clean roller with toothbrush or replace if feeder has been used for a long time. You may ask about a slow-drive replacement power adapter for very small portions if the distribution roller goes too fast. If food is oddly shaped, it will not stack together well within the feeder and will therefore never come out as evenly as ball type kibbles. Check slide shake or replace wire and or slide and gate. Try cleaning. |
|
PET
KNOCKS FOOD OUT OF FEEDER EASILY
OR MOVES FEEDER AROUND MOUNTED TO STAND AND BOWL. |
Tighten/close gate with large black screw (more friction), mount feeder bracket to wall or other item like play stand (mount feeder either low on bowl or high up out of pet reach), or if using plastic feeder mount, fasten base to larger plywood piece that pets will stand on when eating using one screw underneath bowl. Wedge it between some furniture. You may also fasten feeder mount to a bracket as shown bottom of this page or even better, check this anti-skid tape to put on the rubber feet of the stand base which works beautifully. |
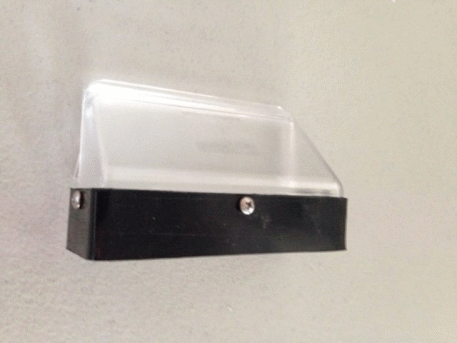
| PET REACHES INSIDE FEEDER EVEN WITH CHUTE COVER INSTALLED. | If able, you could fasten a small plastic strip about 3/4" wide around the lower lip of the chute cover using small screws (see bottom of this page and already modified chute cover). You can place the feeder next to a wall on the side the pet is stretching down to reach into the chute opening from the side. You could also place the feeder between two items like washer and dryer. We have not had reported pet intrusion directly from the front with a chute cover installed and feeder attached to the black stand and bowl. Any reported intrusion has been laying down from one side or the other. Try placing the feeder next to a wall or other item on the side your pet is doing that. |
|
PET DISLODGES METAL BOWL OR OTHER BOWL OF YOUR OWN FROM BASE OF CAT STAND
|
Purchase Velcro strips and attach them to the bottom of bowl and to the top of the stand's plastic base. |
NOTE: THE STANDARD "OFF" RESET TIME IS SET AT 1-2 MINUTES OF OFF TIME. WITH A DIGITAL TIMER, YOU CAN FEED MORE TIMES WITHIN A SHORT PERIOD OF TIME WITH THE SHORT RESET TIME. ON EARLIER MODELS, IF YOU SEE A SHINY PRONG TO THE LEFT OF THE SMALL JUMPER PLUG, YOU HAVE THE LONG STANDARD RESET TIME OF ABOUT 45-60 MINUTES OF "OFF" TIME, WHICH CAN ALSO BE CHANGED (late models do not have a "jumper plug and are set to 1-2 minutes of "off" reset time.)
FOR THE ACDT-20 SUPER FEEDER DIGITAL TIMER, ACAT-23 (TU-22A or TG-16) ANALOG TIMER AND WOODS BRAND DUAL OUTLET DIGITAL TIMER INFO, GO TO:
http://super-feed.com/quickinstallation.htm
ACDT (ETU-63A) DIGITAL TIMER VIDEO: https://www.youtube.com/watch?v=qsX8Rv7CuXk&feature=youtu.be or for plain instructions go to
http://super-feed.com/ACDT-20-Super-Feeder-Digital-Timer.htm
You may control your Super Feeder from anywhere using your Smart Phone with our Wi-Fi Socket or even Xfinity Home accessories like a camera, etc...
SPECIAL NOTE ABOUT PORTION ACCURACY
Like most if not all feeder, some food may be too large and oddly shaped for desired portion accuracy. We do know that the type of food used will affect the portion accuracy in any feeder, and there is nothing that can be done about that issue other than recommending the use of a suitable dry food if accuracy is extremely important. Although the Super Feeder will not count pellets, it should at least be reasonably close as shown by many of our tests. What it will do, as having been tested by the FDA where they once used our feeders, is that for every two cycles it was found to be 90% accurate. In other words, if you feed twice and you want 1/4 cup per day, the first or second portion may not be 100% accurate, but the total daily portion should be within 90% accuracy. These tests were done with uniformly shaped 1/4" round/spherical pellets. Note: If you are using an early model feeder with the smaller chute opening and chute cover, you should not use kibble larger than 3/8" diameter such as pyramid-shaped ones which can be up to 5/8" diameter. They could hang-up and not produce good portion accuracy. The early model housing has a chute opening height of about 3/4".
NOTE: One again, the Super Feeder does not “count’ kibbles, but many tests have shown that an accuracy of +/- 0.1 to 0.2 ounce (by weight) per serving has been achieved using recommended kibbles. Although performance is guaranteed with recommended food as described, please be advised that due to variance of kibble sizes and shapes, 100% portion accuracy simply cannot be guaranteed for all feed cycles with "any" kibbles. If you demand near perfect portion accuracy and feel that you could not switch food, you should purchase a pre-filled portion type feeder.
Science Diet Brand 1/4" diameter kibbles are perfect for the Super Feeder (flat type do not produce as good portion accuracy as spherical (ball) ones).
HOW TO FASTEN FEEDER STAND AND BOWL IF NEEDED AND MODIFY CHUTE COVER FOR THAT VERY PERSISTENT AND CLEVER PET TRYING TO GET FOOD OUT
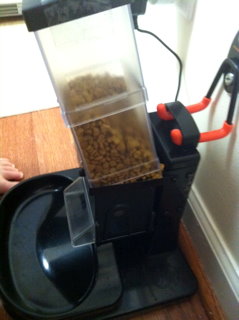
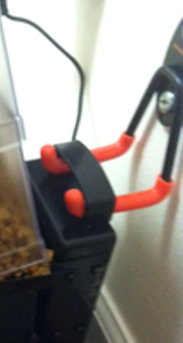
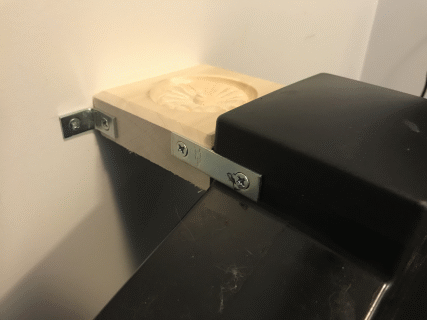
If an extension comes loose, please click on this link: http://www.super-feed.com/extensionhalfmoonnote.htm For extra feeder stability with rowdy pets, the two pictures above left are shared by a customer. A Tornado U-hook from Home Depot is used to fasten the Super Feeder stand and bowl to a wall or other item. It mounts in drywall, which is wonderful. You may need to squeeze the hooks together slightly to fit them into the base's handle, but it actually worked out well because it puts tension on the handle, preventing the machine from moving at all! As the customer said, "I would highly recommend it- easy to install and I think it looks nice too." Center picture has been shared by a customer, Dann, B, using a piece of wood and metal straps. Not going anywhere! Using only one screw in the center under the bowl, you could also fasten the plastic base to a small piece of plywood larger than the base so that your pet would be standing on it when eating. That way, he would not be able to move the machine around. You may also wedge the feeder between some furniture, washer/dryer, etc... If all fails, you may mount the feeder to a customer mount. Lots of ways!
http://www.homedepot.com/p/Tornado-40-lb-Small-Black-Steel-U-Hook-48004/202639941
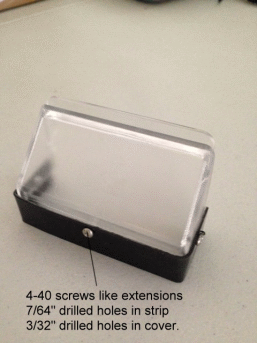
If your unusually clever pet is "somehow" able to reach up inside the feeder's chute, most likely from far left or right side laying down on its side at an angle, you can easily add a formed plastic lip to the chute cover as shown Note: You cannot do that on the early model chute cover that does not have a vertical lip unless you just put a screw on both sides only.
If you do not have what is needed to modify your chute cover, click on the picture at right and you can purchase one as shown above for the late model housing (not available for early model chute cover). It is easy to install by simply removing the feeder floor and sliding it in the grooved chute opening. This modified cover will stop being able to stick paws anywhere close to chute.
We hope this helps answer some questions. If not, give us a call at 615-470-5596 or info@super-feed.com