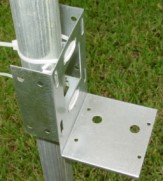
These picture clips apply to all Super Feeder models when using the metal mounting bracket
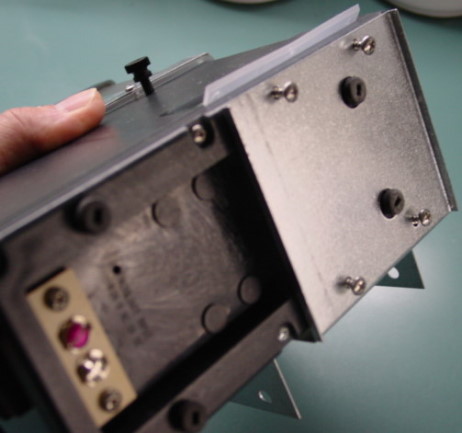
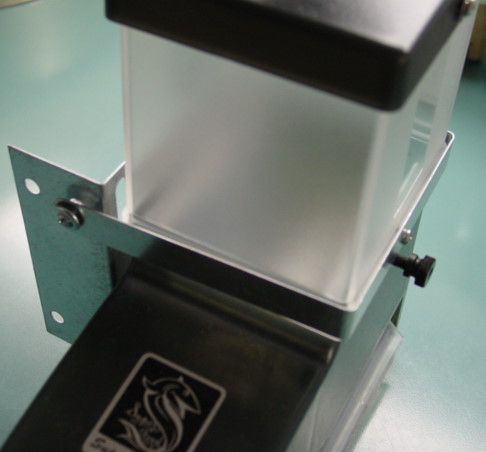
First, slip one hopper extension on the basic feeder. Then, slip one 4-40 fine thread screw through one washer and into the lower end of the extension which will be next to the bracket, and tighten securely. Next, install 4 ea. #6 x 3/8" long screws making sure the rubber feet protrude through the 2 holes in the bracket. Install the retaining strap (right) with the small 4-40 fine thread screw into the hopper extension. Do not use a washer under this screw. You can then attach the strap to the bracket and into a 2 x 4 using two of the 4 supplied #8 x 1/2" long screws. If you mount it to a pipe, you will need to use a couple of screws and nuts to tighten the strap to the bracket (not supplied). Additional straps may be purchased and attached to upper hopper extension to stabilize stacked extensions. Each feeder also has a small plastic loop clamp (not pictured) under the feeder and in the recessed area, which you can use to secure the power adapter cord, whether is is plugged into the jack or attached to the terminal strip. You should not use the feeder's side jack plug outdoors because it may let water in the electronics compartment.
Click on picture above for details of this mount
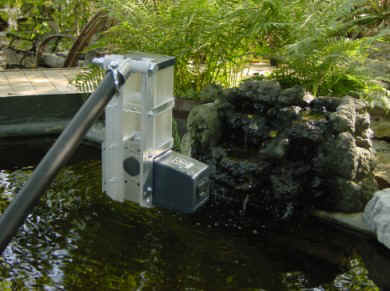
ABOVE, A TYPICAL INSTALLATION OF THE KOI POND SUPER FEEDER MODEL USING A FENCING PIPE, PIPE CAP AND PVC SMALLER PIPE. METAL IN THE SHAPE OF 2X4 CAN ALSO BE USED. ALL THESE ITEMS CAN BE FOUND AT LOWES® OR HOME DEPOT®. PVC OR METAL PIPE CAN BE MADE TO SLIP INTO OTHER PIPE OR PIVOT TO REFILL FEEDER.
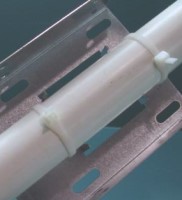
PIPE MOUNT USING CABLE TIES
More pictures of past customers' installations
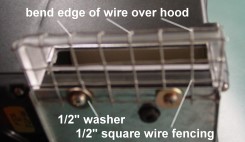
If you think animals like raccoons may be able to put their paws into the chute underneath the hood on the KSF-2, you may use the following technique below to keep that from happening. It's very effective, easy to do, and the pellets will still go through